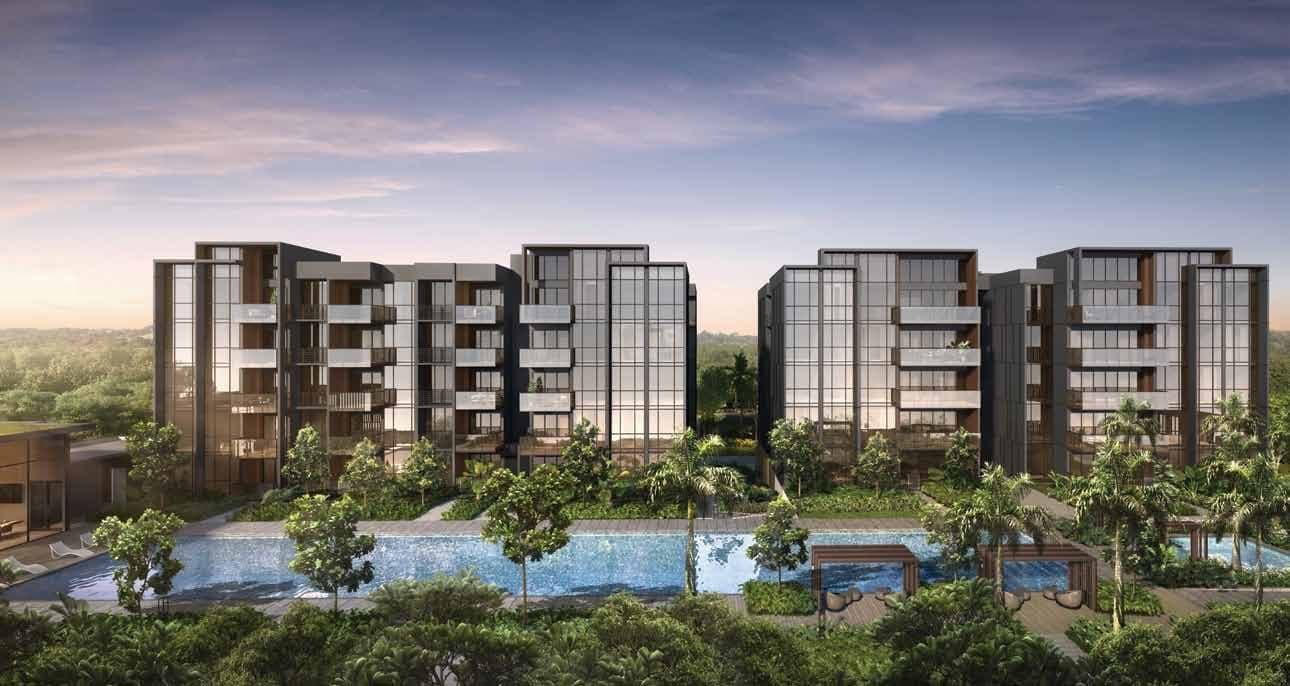
The Commodore
District 27 · 219 homes · 99-year leasehold from 8 June 2020 · Resale · completed 2024
Artist's impression: JBE (Canberra) Pte. Ltd.
All 44 stacks of The Commodore (59 to 69 Canberra Drive) in 3D on the real map, beside the buildings around them at their real heights. Pick a stack and a storey to see its facing, its view and its hours of sun. Recent sale prices, rent and its grade are on the The Commodore resale scorecard.
Coolest stacksEvery stack ranked by direct sun after 2pm, least first.OpenHide
Working out every stack…
How to read the map and the colours
Every home is drawn floor by floor, coloured by unit type, in the same colours as the developer’s site plan. Tap a stack or its number to pick it. Drag to move the map; hold Ctrl or Command and drag (or right-drag) to turn and tilt it. On a phone, one finger moves it and two fingers pinch, twist and tilt it. Zoom in to see every stack number. Navy: your stack. Orange: your storey. Dashed gold line: the view straight out of the window. Dark patches: shadows of the taller buildings at 15:00 on 14/10.
- 1-Bedroom
- 2-Bedroom
- 2-Bedroom Premium + Study
- 3-Bedroom
- 3-Bedroom Premium + Study
- 4-Bedroom
- 4-Bedroom Premium + Study
- 4-Bedroom Exclusive + Study
- 5-Bedroom Exclusive + Study
The Commodore in brief
- Least afternoon sun
- Stacks #01 (storey 1), #01 (storeys 2 to 5), #08 (storey 1), #09 (storey 1), #09 (storeys 2 to 5), #16 (storey 1) and 7 more: under an hour of direct sun after 2pm in every month.
- Clear view
- Stacks #03 (storey 5), #06 (storey 5), #11 (storey 5), #14 (storey 5): no building as tall as the window within 400 m.
- Blocked view
- Stacks #01 (storey 1), #01 (storeys 2 to 5), #02 (storey 5), #02 (storeys 2 to 4), #03 (storey 1), #03 (storeys 2 to 4) and 85 more: face Block 59, Block 69, Blk 57 Canberra Drive and 5 more, as tall as the stack or taller.
Read at the middle storey of each stack. The tool above shows any storey.
Every stack at a glance
Show the table of all 44 stacksHide the table
Computed for the middle storey of each tower (storey 3 in the 5-storey blocks), or the middle of its own storeys for a stack that does not have that storey. Sun columns are hours of direct sun on the window on 21 June and 21 December after shading by other buildings; “Afternoon sun” lists the months with an hour or more after 2pm. Open the tool for any other storey or date.
Block 59 · 5 storeys · 8 stacks
| Stack | Type | Faces | Looks onto | Buildings straight ahead | 21 Jun | 21 Dec | Afternoon sun |
|---|---|---|---|---|---|---|---|
| #01 (storey 1) | 2-Bedroom Premium + Study | N 8° | Block 59 across the grounds, 2 m | Block 59, 2 m (at least as tall as this stack) | 0h | 0h | None |
| #01 (storeys 2 to 5) | 2-Bedroom Premium + Study | N 8° | Block 59 across the grounds, 2 m | Block 59, 2 m (at least as tall as this stack) | 0h | 0h | None |
| #02 (storeys 2 to 4) | 4-Bedroom | N 8° | Block 69 across the grounds, 15 m | Block 69, 15 m (at least as tall as this stack) | 10.2h | 0h | Apr–Aug |
| #02 (storey 5) | 4-Bedroom | N 8° | Block 69 across the grounds, 15 m | Block 69, 15 m (at least as tall as this stack) | 11.1h | 0h | Apr–Aug |
| #03 (storey 1) | 3-Bedroom | S 188° | Out of the estate: Blk 57 Canberra Drive, 15 m | Blk 57 Canberra Drive, 15 m (at least as tall as this stack) | 0h | 8.7h | Sep–Mar |
| #03 (storeys 2 to 4) | 3-Bedroom | S 188° | Out of the estate: Blk 57 Canberra Drive, 15 m | Blk 57 Canberra Drive, 15 m (at least as tall as this stack) | 0h | 10.1h | Sep–Mar |
| #03 (storey 5) | 3-Bedroom | S 188° | Out of the estate: Blk 57 Canberra Drive, 15 m | Blk 57 Canberra Drive, 15 m (seen over from storey 5) | 0h | 11.4h | Sep–Mar |
| #04 (storey 1) | 2-Bedroom | S 188° | Out of the estate: Blk 57 Canberra Drive, 18 m | Blk 57 Canberra Drive, 18 m (at least as tall as this stack) | 0h | 9.1h | Oct–Mar |
| #04 (storeys 2 to 5) | 2-Bedroom | S 188° | Out of the estate: Blk 57 Canberra Drive, 18 m | Blk 57 Canberra Drive, 18 m (seen over from storey 5) | 0h | 10.3h | Sep–Mar |
| #05 (storey 1) | 2-Bedroom Premium + Study | S 188° | Out of the estate: Blk 57 Canberra Drive, 13 m | Blk 57 Canberra Drive, 13 m (at least as tall as this stack) | 0h | 8.8h | Oct–Feb |
| #05 (storeys 2 to 5) | 2-Bedroom Premium + Study | S 188° | Out of the estate: Blk 57 Canberra Drive, 13 m | Blk 57 Canberra Drive, 13 m (seen over from storey 5) | 0h | 10.3h | Oct–Feb |
| #06 (storey 1) | 4-Bedroom Premium + Study | S 188° | Out of the estate: Blk 57 Canberra Drive, 13 m | Blk 57 Canberra Drive, 13 m (at least as tall as this stack) | 0h | 8.7h | Sep–Mar |
| #06 (storeys 2 to 4) | 4-Bedroom Premium + Study | S 188° | Out of the estate: Blk 57 Canberra Drive, 13 m | Blk 57 Canberra Drive, 13 m (at least as tall as this stack) | 0h | 10.2h | Sep–Mar |
| #06 (storey 5) | 4-Bedroom Premium + Study | S 188° | Out of the estate: Blk 57 Canberra Drive, 13 m | Blk 57 Canberra Drive, 13 m (seen over from storey 5) | 0h | 11.6h | Sep–Mar |
| #07 (storey 1) | 3-Bedroom Premium + Study | N 8° | Children's Playground, 7 m | Block 69, 15 m (at least as tall as this stack) | 9.9h | 0h | Apr–Aug |
| #07 (storeys 2 to 4) | 3-Bedroom Premium + Study | N 8° | Children's Playground, 7 m | Block 69, 15 m (at least as tall as this stack) | 10.9h | 0h | Apr–Aug |
| #07 (storey 5) | 3-Bedroom Premium + Study | N 8° | Children's Playground, 7 m | Block 69, 15 m (at least as tall as this stack) | 11.6h | 0h | Apr–Aug |
| #08 (storey 1) | 1-Bedroom | N 8° | Block 59 across the grounds, 1 m | Block 59, 1 m (at least as tall as this stack) | 0h | 0h | None |
| #08 (storeys 2 to 5) | 1-Bedroom | N 8° | Block 59 across the grounds, 1 m | Block 59, 1 m (at least as tall as this stack) | 0h | 0h | Apr |
Block 61 · 5 storeys · 8 stacks
| Stack | Type | Faces | Looks onto | Buildings straight ahead | 21 Jun | 21 Dec | Afternoon sun |
|---|---|---|---|---|---|---|---|
| #09 (storey 1) | 2-Bedroom Premium + Study | N 8° | Block 61 across the grounds, 2 m | Block 61, 2 m (at least as tall as this stack) | 0h | 0h | None |
| #09 (storeys 2 to 5) | 2-Bedroom Premium + Study | N 8° | Block 61 across the grounds, 2 m | Block 61, 2 m (at least as tall as this stack) | 0h | 0h | None |
| #10 (storey 1) | 4-Bedroom | N 8° | Family Lawn, 27 m · 50m Lap Pool, 44 m | Block 65, 55 m (at least as tall as this stack) | 9.6h | 0h | Apr–Aug |
| #10 (storeys 2 to 4) | 4-Bedroom | N 8° | Family Lawn, 27 m · 50m Lap Pool, 44 m | Block 65, 55 m (at least as tall as this stack) | 10.9h | 0h | Apr–Aug |
| #10 (storey 5) | 4-Bedroom | N 8° | Family Lawn, 27 m · 50m Lap Pool, 44 m | Block 65, 55 m (at least as tall as this stack) | 11.6h | 0h | Apr–Aug |
| #11 (storey 1) | 3-Bedroom | S 188° | Out of the estate: Blk 55 Canberra Drive, 14 m | Blk 55 Canberra Drive, 14 m (at least as tall as this stack) | 0h | 8.9h | Sep–Mar |
| #11 (storeys 2 to 4) | 3-Bedroom | S 188° | Out of the estate: Blk 55 Canberra Drive, 14 m | Blk 55 Canberra Drive, 14 m (at least as tall as this stack) | 0h | 10.5h | Sep–Mar |
| #11 (storey 5) | 3-Bedroom | S 188° | Out of the estate: Blk 55 Canberra Drive, 14 m | Blk 55 Canberra Drive, 14 m (seen over from storey 5) | 0h | 11.6h | Sep–Mar |
| #12 (storey 1) | 2-Bedroom | S 188° | Out of the estate: Blk 55 Canberra Drive, 17 m | Blk 55 Canberra Drive, 17 m (at least as tall as this stack) | 0h | 9.4h | Oct–Mar |
| #12 (storeys 2 to 5) | 2-Bedroom | S 188° | Out of the estate: Blk 55 Canberra Drive, 17 m | Blk 55 Canberra Drive, 17 m (seen over from storey 5) | 0h | 11.3h | Sep–Mar |
| #13 (storey 1) | 2-Bedroom Premium + Study | S 188° | Out of the estate: Blk 55 Canberra Drive, 16 m | Blk 55 Canberra Drive, 16 m (at least as tall as this stack) | 0h | 10.0h | Oct–Feb |
| #13 (storeys 2 to 5) | 2-Bedroom Premium + Study | S 188° | Out of the estate: Blk 55 Canberra Drive, 16 m | Blk 55 Canberra Drive, 16 m (seen over from storey 5) | 0h | 11.3h | Oct–Feb |
| #14 (storey 1) | 4-Bedroom Premium + Study | S 188° | Out of the estate: Blk 55 Canberra Drive, 12 m | Blk 55 Canberra Drive, 12 m (at least as tall as this stack) | 0h | 9.8h | Sep–Mar |
| #14 (storeys 2 to 4) | 4-Bedroom Premium + Study | S 188° | Out of the estate: Blk 55 Canberra Drive, 12 m | Blk 55 Canberra Drive, 12 m (at least as tall as this stack) | 0h | 11.3h | Sep–Mar |
| #14 (storey 5) | 4-Bedroom Premium + Study | S 188° | Out of the estate: Blk 55 Canberra Drive, 12 m | Blk 55 Canberra Drive, 12 m (seen over from storey 5) | 0h | 11.8h | Sep–Mar |
| #15 (storey 1) | 3-Bedroom Premium + Study | N 8° | Block 63 across the grounds, 18 m | Block 63, 18 m (at least as tall as this stack) | 9.3h | 0h | Apr–Aug |
| #15 (storeys 2 to 4) | 3-Bedroom Premium + Study | N 8° | Block 63 across the grounds, 18 m | Block 63, 18 m (at least as tall as this stack) | 11.2h | 0h | Apr–Aug |
| #15 (storey 5) | 3-Bedroom Premium + Study | N 8° | Block 63 across the grounds, 18 m | Block 63, 18 m (at least as tall as this stack) | 11.8h | 0h | Apr–Aug |
| #16 (storey 1) | 1-Bedroom | N 8° | Block 61 across the grounds, 2 m | Block 61, 2 m (at least as tall as this stack) | 0h | 0h | None |
| #16 (storeys 2 to 5) | 1-Bedroom | N 8° | Block 61 across the grounds, 2 m | Block 61, 2 m (at least as tall as this stack) | 0h | 0h | Apr |
Block 63 · 5 storeys · 4 stacks
| Stack | Type | Faces | Looks onto | Buildings straight ahead | 21 Jun | 21 Dec | Afternoon sun |
|---|---|---|---|---|---|---|---|
| #17 (storey 1) | 4-Bedroom Premium + Study | N 8° | 50m Lap Pool, 4 m | Block 65, 18 m (at least as tall as this stack) | 9.5h | 0h | Apr–Aug |
| #17 (storeys 2 to 4) | 4-Bedroom Exclusive + Study | N 8° | 50m Lap Pool, 4 m | Block 65, 18 m (at least as tall as this stack) | 10.8h | 0h | Apr–Aug |
| #17 (storey 5) | 4-Bedroom Exclusive + Study | N 8° | 50m Lap Pool, 4 m | Block 65, 18 m (at least as tall as this stack) | 11.7h | 0h | Apr–Aug |
| #18 (storey 1) | 5-Bedroom Exclusive + Study | S 188° | Block 61 across the grounds, 15 m | Block 61, 15 m (at least as tall as this stack) | 0h | 9.2h | Sep–Mar |
| #18 (storeys 2 to 4) | 5-Bedroom Exclusive + Study | S 188° | Block 61 across the grounds, 15 m | Block 61, 15 m (at least as tall as this stack) | 0h | 11.2h | Sep–Mar |
| #18 (storey 5) | 5-Bedroom Exclusive + Study | S 188° | Block 61 across the grounds, 15 m | Block 61, 15 m (at least as tall as this stack) | 0h | 11.6h | Sep–Mar |
| #19 (storey 1) | 4-Bedroom Premium + Study | S 188° | The Commodore's Lawn, 13 m | Block 61, 18 m (at least as tall as this stack) | 0h | 9.9h | Sep–Mar |
| #19 (storeys 2 to 4) | 4-Bedroom Exclusive + Study | S 188° | The Commodore's Lawn, 13 m | Block 61, 18 m (at least as tall as this stack) | 0h | 11.3h | Sep–Mar |
| #19 (storey 5) | 4-Bedroom Exclusive + Study | S 188° | The Commodore's Lawn, 13 m | Block 61, 18 m (at least as tall as this stack) | 0h | 11.6h | Sep–Mar |
| #20 (storey 1) | 5-Bedroom Exclusive + Study | N 8° | Children's Wading Pool, 3 m | Block 65, 15 m (at least as tall as this stack) | 9.3h | 0h | Apr–Aug |
| #20 (storeys 2 to 4) | 5-Bedroom Exclusive + Study | N 8° | Children's Wading Pool, 3 m | Block 65, 15 m (at least as tall as this stack) | 11.0h | 0h | Apr–Aug |
| #20 (storey 5) | 5-Bedroom Exclusive + Study | N 8° | Children's Wading Pool, 3 m | Block 65, 15 m (at least as tall as this stack) | 11.9h | 0h | Apr–Aug |
Block 65 · 5 storeys · 8 stacks
| Stack | Type | Faces | Looks onto | Buildings straight ahead | 21 Jun | 21 Dec | Afternoon sun |
|---|---|---|---|---|---|---|---|
| #21 (storey 1) | 2-Bedroom Premium + Study | N 8° | Block 65 across the grounds, 2 m | Block 65, 2 m (at least as tall as this stack) | 0h | 0h | None |
| #21 (storeys 2 to 5) | 2-Bedroom Premium + Study | N 8° | Block 65 across the grounds, 2 m | Block 65, 2 m (at least as tall as this stack) | 0h | 0h | None |
| #22 (storey 1) | 4-Bedroom | N 8° | Out of the estate: Blk 376A Canberra Drive, 228 m | Blk 376A Canberra Drive, 228 m (at least as tall as this stack) | 10.8h | 0h | Apr–Aug |
| #22 (storeys 2 to 4) | 4-Bedroom | N 8° | Out of the estate: Blk 376A Canberra Drive, 228 m | Blk 376A Canberra Drive, 228 m (at least as tall as this stack) | 11.3h | 0h | Apr–Aug |
| #22 (storey 5) | 4-Bedroom | N 8° | Out of the estate: Blk 376A Canberra Drive, 228 m | Blk 376A Canberra Drive, 228 m (at least as tall as this stack) | 11.6h | 0h | Apr–Aug |
| #23 (storey 1) | 3-Bedroom | S 188° | 50m Lap Pool, 6 m · Family Lawn, 28 m | Block 63, 19 m (at least as tall as this stack) | 0h | 8.9h | Sep–Mar |
| #23 (storeys 2 to 4) | 3-Bedroom | S 188° | 50m Lap Pool, 6 m · Family Lawn, 28 m | Block 63, 19 m (at least as tall as this stack) | 0h | 10.1h | Sep–Mar |
| #23 (storey 5) | 3-Bedroom | S 188° | 50m Lap Pool, 6 m · Family Lawn, 28 m | Block 63, 19 m (at least as tall as this stack) | 0h | 11.3h | Sep–Mar |
| #24 (storey 1) | 2-Bedroom | S 188° | Spa Pool, 6 m | Block 63, 18 m (at least as tall as this stack) | 0h | 10.5h | Oct–Mar |
| #24 (storeys 2 to 5) | 2-Bedroom | S 188° | Spa Pool, 6 m | Block 63, 18 m (at least as tall as this stack) | 0h | 11.2h | Sep–Mar |
| #25 (storey 1) | 2-Bedroom Premium + Study | S 188° | Spa Pool, 7 m | Block 63, 16 m (at least as tall as this stack) | 0h | 10.1h | Nov–Feb |
| #25 (storeys 2 to 5) | 2-Bedroom Premium + Study | S 188° | Spa Pool, 7 m | Block 63, 16 m (at least as tall as this stack) | 0h | 11.3h | Nov–Feb |
| #26 (storey 1) | 4-Bedroom Premium + Study | S 188° | Children's Wading Pool, 4 m | Block 63, 15 m (at least as tall as this stack) | 0h | 9.8h | Sep–Mar |
| #26 (storeys 2 to 4) | 4-Bedroom Premium + Study | S 188° | Children's Wading Pool, 4 m | Block 63, 15 m (at least as tall as this stack) | 0h | 11.3h | Sep–Mar |
| #26 (storey 5) | 4-Bedroom Premium + Study | S 188° | Children's Wading Pool, 4 m | Block 63, 15 m (at least as tall as this stack) | 0h | 11.7h | Sep–Mar |
| #27 (storey 1) | 3-Bedroom Premium + Study | N 8° | Out of the estate | Open, nothing within 400 m | 10.9h | 0h | Apr–Aug |
| #27 (storeys 2 to 4) | 3-Bedroom Premium + Study | N 8° | Out of the estate | Open, nothing within 400 m | 11.4h | 0h | Apr–Aug |
| #27 (storey 5) | 3-Bedroom Premium + Study | N 8° | Out of the estate | Open, nothing within 400 m | 11.7h | 0h | Apr–Aug |
| #28 (storey 1) | 1-Bedroom | N 8° | Block 65 across the grounds, 1 m | Block 65, 1 m (at least as tall as this stack) | 0h | 0h | None |
| #28 (storeys 2 to 5) | 1-Bedroom | N 8° | Block 65 across the grounds, 1 m | Block 65, 1 m (at least as tall as this stack) | 0h | 0h | Apr |
Block 67 · 5 storeys · 8 stacks
| Stack | Type | Faces | Looks onto | Buildings straight ahead | 21 Jun | 21 Dec | Afternoon sun |
|---|---|---|---|---|---|---|---|
| #29 (storey 1) | 2-Bedroom Premium + Study | N 8° | Block 67 across the grounds, 2 m | Block 67, 2 m (at least as tall as this stack) | 0h | 0h | None |
| #29 (storeys 2 to 5) | 2-Bedroom Premium + Study | N 8° | Block 67 across the grounds, 2 m | Block 67, 2 m (at least as tall as this stack) | 0h | 0h | None |
| #30 (storey 1) | 4-Bedroom | N 8° | Out of the estate: Blk 376B Canberra Drive, 182 m | Blk 376B Canberra Drive, 182 m (at least as tall as this stack) | 11.6h | 0h | Apr–Aug |
| #30 (storeys 2 to 4) | 4-Bedroom | N 8° | Out of the estate: Blk 376B Canberra Drive, 182 m | Blk 376B Canberra Drive, 182 m (at least as tall as this stack) | 11.9h | 0h | Apr–Aug |
| #30 (storey 5) | 4-Bedroom | N 8° | Out of the estate: Blk 376B Canberra Drive, 182 m | Blk 376B Canberra Drive, 182 m (at least as tall as this stack) | 12.1h | 0h | Apr–Aug |
| #31 (storey 1) | 3-Bedroom | S 188° | 50m Lap Pool, 7 m | Block 69, 17 m (at least as tall as this stack) | 0h | 8.2h | Sep–Mar |
| #31 (storeys 2 to 4) | 3-Bedroom | S 188° | 50m Lap Pool, 7 m | Block 69, 17 m (at least as tall as this stack) | 0h | 9.6h | Sep–Mar |
| #31 (storey 5) | 3-Bedroom | S 188° | 50m Lap Pool, 7 m | Block 69, 17 m (at least as tall as this stack) | 0h | 10.9h | Sep–Mar |
| #32 (storey 1) | 2-Bedroom | S 188° | 50m Lap Pool, 6 m | Block 69, 16 m (at least as tall as this stack) | 0h | 8.8h | Oct–Mar |
| #32 (storeys 2 to 5) | 2-Bedroom | S 188° | 50m Lap Pool, 6 m | Block 69, 16 m (at least as tall as this stack) | 0h | 9.8h | Sep–Mar |
| #33 (storey 1) | 2-Bedroom Premium + Study | S 188° | 50m Lap Pool, 5 m | Block 69, 16 m (at least as tall as this stack) | 0h | 8.8h | Nov–Feb |
| #33 (storeys 2 to 5) | 2-Bedroom Premium + Study | S 188° | 50m Lap Pool, 5 m | Block 69, 16 m (at least as tall as this stack) | 0h | 9.8h | Nov–Feb |
| #34 (storey 1) | 4-Bedroom Premium + Study | S 188° | 50m Lap Pool, 4 m | Block 69, 15 m (at least as tall as this stack) | 0h | 8.6h | Sep–Mar |
| #34 (storeys 2 to 4) | 4-Bedroom Premium + Study | S 188° | 50m Lap Pool, 4 m | Block 69, 15 m (at least as tall as this stack) | 0h | 9.8h | Sep–Mar |
| #34 (storey 5) | 4-Bedroom Premium + Study | S 188° | 50m Lap Pool, 4 m | Block 69, 15 m (at least as tall as this stack) | 0h | 11.2h | Sep–Mar |
| #35 (storey 1) | 3-Bedroom Premium + Study | N 8° | Out of the estate: Blk 376A Canberra Drive, 228 m | Blk 376A Canberra Drive, 228 m (at least as tall as this stack) | 10.9h | 0h | Apr–Aug |
| #35 (storeys 2 to 4) | 3-Bedroom Premium + Study | N 8° | Out of the estate: Blk 376A Canberra Drive, 228 m | Blk 376A Canberra Drive, 228 m (at least as tall as this stack) | 11.3h | 0h | Apr–Aug |
| #35 (storey 5) | 3-Bedroom Premium + Study | N 8° | Out of the estate: Blk 376A Canberra Drive, 228 m | Blk 376A Canberra Drive, 228 m (at least as tall as this stack) | 11.6h | 0h | Apr–Aug |
| #36 (storey 1) | 1-Bedroom | N 8° | Block 67 across the grounds, 1 m | Block 67, 1 m (at least as tall as this stack) | 0h | 0h | None |
| #36 (storeys 2 to 5) | 1-Bedroom | N 8° | Block 67 across the grounds, 1 m | Block 67, 1 m (at least as tall as this stack) | 0h | 0h | Apr |
Block 69 · 5 storeys · 8 stacks
| Stack | Type | Faces | Looks onto | Buildings straight ahead | 21 Jun | 21 Dec | Afternoon sun |
|---|---|---|---|---|---|---|---|
| #37 (storey 1) | 2-Bedroom Premium + Study | N 8° | 50m Lap Pool, 3 m | Block 67, 19 m (at least as tall as this stack) | 10.0h | 0h | May–Aug |
| #37 (storeys 2 to 5) | 2-Bedroom Premium + Study | N 8° | 50m Lap Pool, 3 m | Block 67, 19 m (at least as tall as this stack) | 10.7h | 0h | May–Aug |
| #38 (storey 1) | 2-Bedroom Premium + Study | N 8° | 50m Lap Pool, 2 m | Block 67, 17 m (at least as tall as this stack) | 10.0h | 0h | Apr–Aug |
| #38 (storeys 2 to 4) | 2-Bedroom Premium + Study | N 8° | 50m Lap Pool, 2 m | Block 67, 17 m (at least as tall as this stack) | 10.8h | 0h | Apr–Aug |
| #38 (storey 5) | 2-Bedroom Premium + Study | N 8° | 50m Lap Pool, 2 m | Block 67, 17 m (at least as tall as this stack) | 11.4h | 0h | Apr–Aug |
| #39 (storey 1) | 2-Bedroom Premium + Study | S 188° | Tree House, 12 m · The Arrival, 14 m | Block 59, 14 m (at least as tall as this stack) | 0h | 8.3h | Sep–Mar |
| #39 (storeys 2 to 4) | 2-Bedroom Premium + Study | S 188° | Tree House, 12 m · The Arrival, 14 m | Block 59, 14 m (at least as tall as this stack) | 0h | 9.8h | Sep–Mar |
| #39 (storey 5) | 2-Bedroom Premium + Study | S 188° | Tree House, 12 m · The Arrival, 14 m | Block 59, 14 m (at least as tall as this stack) | 0h | 11.1h | Sep–Mar |
| #40 (storey 1) | 2-Bedroom | S 188° | Tree House, 11 m | Block 59, 15 m (at least as tall as this stack) | 0h | 8.7h | Oct–Mar |
| #40 (storeys 2 to 5) | 2-Bedroom | S 188° | Tree House, 11 m | Block 59, 15 m (at least as tall as this stack) | 0h | 9.9h | Sep–Mar |
| #41 (storey 1) | 2-Bedroom Premium + Study | S 188° | Children's Playground, 10 m | Block 59, 15 m (at least as tall as this stack) | 0h | 8.8h | Nov–Feb |
| #41 (storeys 2 to 5) | 2-Bedroom Premium + Study | S 188° | Children's Playground, 10 m | Block 59, 15 m (at least as tall as this stack) | 0h | 9.9h | Nov–Feb |
| #42 (storey 1) | 4-Bedroom Premium + Study | S 188° | Children's Playground, 8 m | Block 59, 15 m (at least as tall as this stack) | 0h | 8.4h | Sep–Mar |
| #42 (storeys 2 to 4) | 4-Bedroom Premium + Study | S 188° | Children's Playground, 8 m | Block 59, 15 m (at least as tall as this stack) | 0h | 9.9h | Sep–Mar |
| #42 (storey 5) | 4-Bedroom Premium + Study | S 188° | Children's Playground, 8 m | Block 59, 15 m (at least as tall as this stack) | 0h | 11.2h | Sep–Mar |
| #43 (storey 1) | 3-Bedroom Premium + Study | N 8° | 50m Lap Pool, 3 m | Block 67, 15 m (at least as tall as this stack) | 9.9h | 0h | Apr–Aug |
| #43 (storeys 2 to 4) | 3-Bedroom Premium + Study | N 8° | 50m Lap Pool, 3 m | Block 67, 15 m (at least as tall as this stack) | 11.0h | 0h | Apr–Aug |
| #43 (storey 5) | 3-Bedroom Premium + Study | N 8° | 50m Lap Pool, 3 m | Block 67, 15 m (at least as tall as this stack) | 11.5h | 0h | Apr–Aug |
| #44 (storey 1) | 1-Bedroom | N 8° | Block 69 across the grounds, 1 m | Block 69, 1 m (at least as tall as this stack) | 0h | 0h | None |
| #44 (storeys 2 to 5) | 1-Bedroom | N 8° | Block 69 across the grounds, 1 m | Block 69, 1 m (at least as tall as this stack) | 0h | 0h | Apr |
Frequently asked questions
Which The Commodore stacks avoid the afternoon sun?
9 stacks get under an hour of direct sun after 2pm, every month of the year.
- #01
- #08 (storey 1)
- #09
- #16 (storey 1)
- #21
- #28 (storey 1)
- #29
- #36 (storey 1)
- #44 (storey 1)
Mid-height storey, after shading by neighbouring blocks. The tool above shows any storey.
Which The Commodore stacks take the afternoon sun most of the year?
No stack takes the afternoon sun in ten or more months at mid-height.
Which The Commodore stacks have the most open view?
4 stacks have a clear view across the whole window.
- #03 (storey 5)
- #06 (storey 5)
- #11 (storey 5)
- #14 (storey 5)
Mid-height storey. Clear means all nine sight lines (±40° of the facing) pass no building as tall as the window within 400 m.
Which The Commodore stacks look straight at another block?
These face a building at least as tall as themselves, so no storey looks over it.
Block 59
- #01 (storey 1) · 2 m
- #01 (storeys 2 to 5) · 2 m
- #08 (storey 1) · 1 m
- #08 (storeys 2 to 5) · 1 m
- #39 (storey 1) · 14 m
- #39 (storey 5) · 14 m
- #39 (storeys 2 to 4) · 14 m
- #40 (storey 1) · 15 m
- #40 (storeys 2 to 5) · 15 m
- #41 (storey 1) · 15 m
- #41 (storeys 2 to 5) · 15 m
- #42 (storey 1) · 15 m
- #42 (storey 5) · 15 m
- #42 (storeys 2 to 4) · 15 m
Block 69
- #02 (storey 5) · 15 m
- #02 (storeys 2 to 4) · 15 m
- #07 (storey 1) · 15 m
- #07 (storey 5) · 15 m
- #07 (storeys 2 to 4) · 15 m
- #31 (storey 1) · 17 m
- #31 (storey 5) · 17 m
- #31 (storeys 2 to 4) · 17 m
- #32 (storey 1) · 16 m
- #32 (storeys 2 to 5) · 16 m
- #33 (storey 1) · 16 m
- #33 (storeys 2 to 5) · 16 m
- #34 (storey 1) · 15 m
- #34 (storey 5) · 15 m
- #34 (storeys 2 to 4) · 15 m
- #44 (storey 1) · 1 m
- #44 (storeys 2 to 5) · 1 m
Blk 57 Canberra Drive
- #03 (storey 1) · 15 m
- #03 (storeys 2 to 4) · 15 m
- #04 (storey 1) · 18 m
- #05 (storey 1) · 13 m
- #06 (storey 1) · 13 m
- #06 (storeys 2 to 4) · 13 m
Block 61
- #09 (storey 1) · 2 m
- #09 (storeys 2 to 5) · 2 m
- #16 (storey 1) · 2 m
- #16 (storeys 2 to 5) · 2 m
- #18 (storey 1) · 15 m
- #18 (storey 5) · 15 m
- #18 (storeys 2 to 4) · 15 m
- #19 (storey 1) · 18 m
- #19 (storey 5) · 18 m
- #19 (storeys 2 to 4) · 18 m
Block 65
- #10 (storey 1) · 55 m
- #10 (storey 5) · 55 m
- #10 (storeys 2 to 4) · 55 m
- #17 (storey 1) · 18 m
- #17 (storey 5) · 18 m
- #17 (storeys 2 to 4) · 18 m
- #20 (storey 1) · 15 m
- #20 (storey 5) · 15 m
- #20 (storeys 2 to 4) · 15 m
- #21 (storey 1) · 2 m
- #21 (storeys 2 to 5) · 2 m
- #28 (storey 1) · 1 m
- #28 (storeys 2 to 5) · 1 m
Blk 55 Canberra Drive
- #11 (storey 1) · 14 m
- #11 (storeys 2 to 4) · 14 m
- #12 (storey 1) · 17 m
- #13 (storey 1) · 16 m
- #14 (storey 1) · 12 m
- #14 (storeys 2 to 4) · 12 m
Block 63
- #15 (storey 1) · 18 m
- #15 (storey 5) · 18 m
- #15 (storeys 2 to 4) · 18 m
- #23 (storey 1) · 19 m
- #23 (storey 5) · 19 m
- #23 (storeys 2 to 4) · 19 m
- #24 (storey 1) · 18 m
- #24 (storeys 2 to 5) · 18 m
- #25 (storey 1) · 16 m
- #25 (storeys 2 to 5) · 16 m
- #26 (storey 1) · 15 m
- #26 (storey 5) · 15 m
- #26 (storeys 2 to 4) · 15 m
Block 67
- #29 (storey 1) · 2 m
- #29 (storeys 2 to 5) · 2 m
- #36 (storey 1) · 1 m
- #36 (storeys 2 to 5) · 1 m
- #37 (storey 1) · 19 m
- #37 (storeys 2 to 5) · 19 m
- #38 (storey 1) · 17 m
- #38 (storey 5) · 17 m
- #38 (storeys 2 to 4) · 17 m
- #43 (storey 1) · 15 m
- #43 (storey 5) · 15 m
- #43 (storeys 2 to 4) · 15 m
Which The Commodore stacks face a pool?
Grouped by the pool each stack looks onto.
50m Lap Pool
- #17 (storey 1)
- #17 (storey 5)
- #17 (storeys 2 to 4)
- #23 (storey 1)
- #23 (storey 5)
- #23 (storeys 2 to 4)
- #31 (storey 1)
- #31 (storey 5)
- #31 (storeys 2 to 4)
- #32 (storey 1)
- #32 (storeys 2 to 5)
- #33 (storey 1)
- #33 (storeys 2 to 5)
- #34 (storey 1)
- #34 (storey 5)
- #34 (storeys 2 to 4)
- #37 (storey 1)
- #37 (storeys 2 to 5)
- #38 (storey 1)
- #38 (storey 5)
- #38 (storeys 2 to 4)
- #43 (storey 1)
- #43 (storey 5)
- #43 (storeys 2 to 4)
Children's Wading Pool
- #20 (storey 1)
- #20 (storey 5)
- #20 (storeys 2 to 4)
- #26 (storey 1)
- #26 (storey 5)
- #26 (storeys 2 to 4)
Spa Pool
- #24 (storey 1)
- #24 (storeys 2 to 5)
- #25 (storey 1)
- #25 (storeys 2 to 5)
Counts when at least a quarter of the window looks onto water before another tower.
Which The Commodore stacks face a road?
None of the stacks has a bordering road within 80 m straight ahead.
Can I see the The Commodore floor plans?
Yes. Pick a stack and its floor plan shows beside the map, as the developer published it: 46 layouts, each with its size, the units it applies to and a key plan. Tap it to enlarge.
How this is worked out, and its limits
Stacks are traced from the developer’s site plan onto the map, and the sun and view are worked out against the buildings around them. Details are as at 2026-10-13 and can change.
Show the method and its limitsHide the method
Where the stacks are. Each stack’s outline is traced from the developer’s site plan and fitted to the land parcel on the map. Expect positions within a few metres and bearings within a few degrees. Unit types come from the colour the site plan gives each stack and add up to the published unit mix, and the map uses those same colours; 44 of the 44 stacks are also named on the developer’s floor plans, and all of those match.
Facing. The facing is the side the living room and balcony are on, read from the developer’s floor plan for each of the 44 stacks. End and corner homes also have bedroom windows on a second side, which the tool does not model.
What it looks onto. The pools, lawns, courts and pavilions are read off the developer’s site plan and placed on the map with the same fit as the stacks, so they are right to within a few metres. A stack “looks onto” a pool when at least a quarter of 17 sight lines across its window (40° either side of the facing) reach the water before another tower of the project. It “faces out of the estate” when the site boundary is within 50 m straight ahead. Facility names and positions are the developer’s and can change before completion.
Heights. Towers use the developer’s storey counts at an assumed 3.3 m per storey. Buildings standing around the estate use the height in the Singapore Land Authority’s 3D model, read off OneMap 3D on 2 October 2026; where one outline covers a tower and its podium, it is cut into its parts. A building not yet in that model (still being built) uses its published storey count at 3.6 m a storey for a condo and 3.0 m for an HDB block, the averages measured for built ones. Every building is modelled as its footprint raised straight up, on level ground: no roofs, balconies, trees or slopes.
Sun. The same solar model as the Sun Path & Facing Calculator, checked to within about three minutes, with a building in the way counted as shade. The window is a point at mid-storey height on the middle of the outside wall. Balconies, overhangs and cloud cut real sun further, so read the hours as a ceiling.
Sun across the year and coolest stacks. The year grid tests the window every half hour on the 15th of each month. Coolest stacks ranks by the average of those twelve days in hours of direct sun after 2pm, least first, at the middle storey of each stack with shade from other buildings taken off; the hours for the whole day sit beside it. For a home at the end of its block the afternoon figure also counts the sun on its end wall.
Floor plans. The developer’s own pages, unaltered, matched to each stack by the layout code on the developer’s schematic diagram. A stack the plan lists as a mirror unit is the plan flipped. Floor plans: JBE (Canberra) Pte. Ltd., The Commodore brochure. Developer's plans, approximate and subject to change. Storey-1 homes have a private enclosed space in place of the balcony, and storey-5 (PH) homes a high ceiling over living and dining: the close-up is the type's typical plan, see the full page.
Not shown. Asking prices: a resale home is priced by its owner, and what is on the market changes by the week. Anything the developer did not publish is not shown either. Details are as at 2026-10-13 and can change. Sources: Developer's brochure (JBE (Canberra) Pte. Ltd.); OneMap; OpenStreetMap.
Want a second pair of eyes on these numbers?
Estimates are a starting point. Leave your details and we’ll sanity-check your numbers with you before you commit.
Or write to us first: WhatsApp us your numbers
Next step
- Sun path hereSun on every facing, any date
- Can I afford it?Max loan and price from your income
- Resale scorecardGrade, recent prices and rent
- Canberra Crescent Residences1.0 km away · Launched August 2025
- Norwood Grand4.3 km away · Launched October 2024
- Springleaf Residence5.2 km away · Launched August 2025